There are two different types of approval flows that you can create:
- Automatic approval flows and
- Manual approval flows.
When setting up an approval flow, you must remember that the item will only appear in reporting and dasboards after the whole automatic approval process has been completed. Before that, the agreement won’t be shown anywhere else than in related contract register.
Automatic approval flows
Automatic approvals are created by selecting Task Management > Approval flows > Add.

After that you can set the parameters for the approval flow by:
- Adding a name.
- Selecting related module or function from the dropdown menu under 'Approval flow'.
- Selecting for the approval flow triggering event. By default, the selection is 'Add' meaning that whenever an item is added on the module or function as selected for the approval flow, it triggers the approval flow. If selected “Update” you can define the exact triggering field or data detailed on the list.

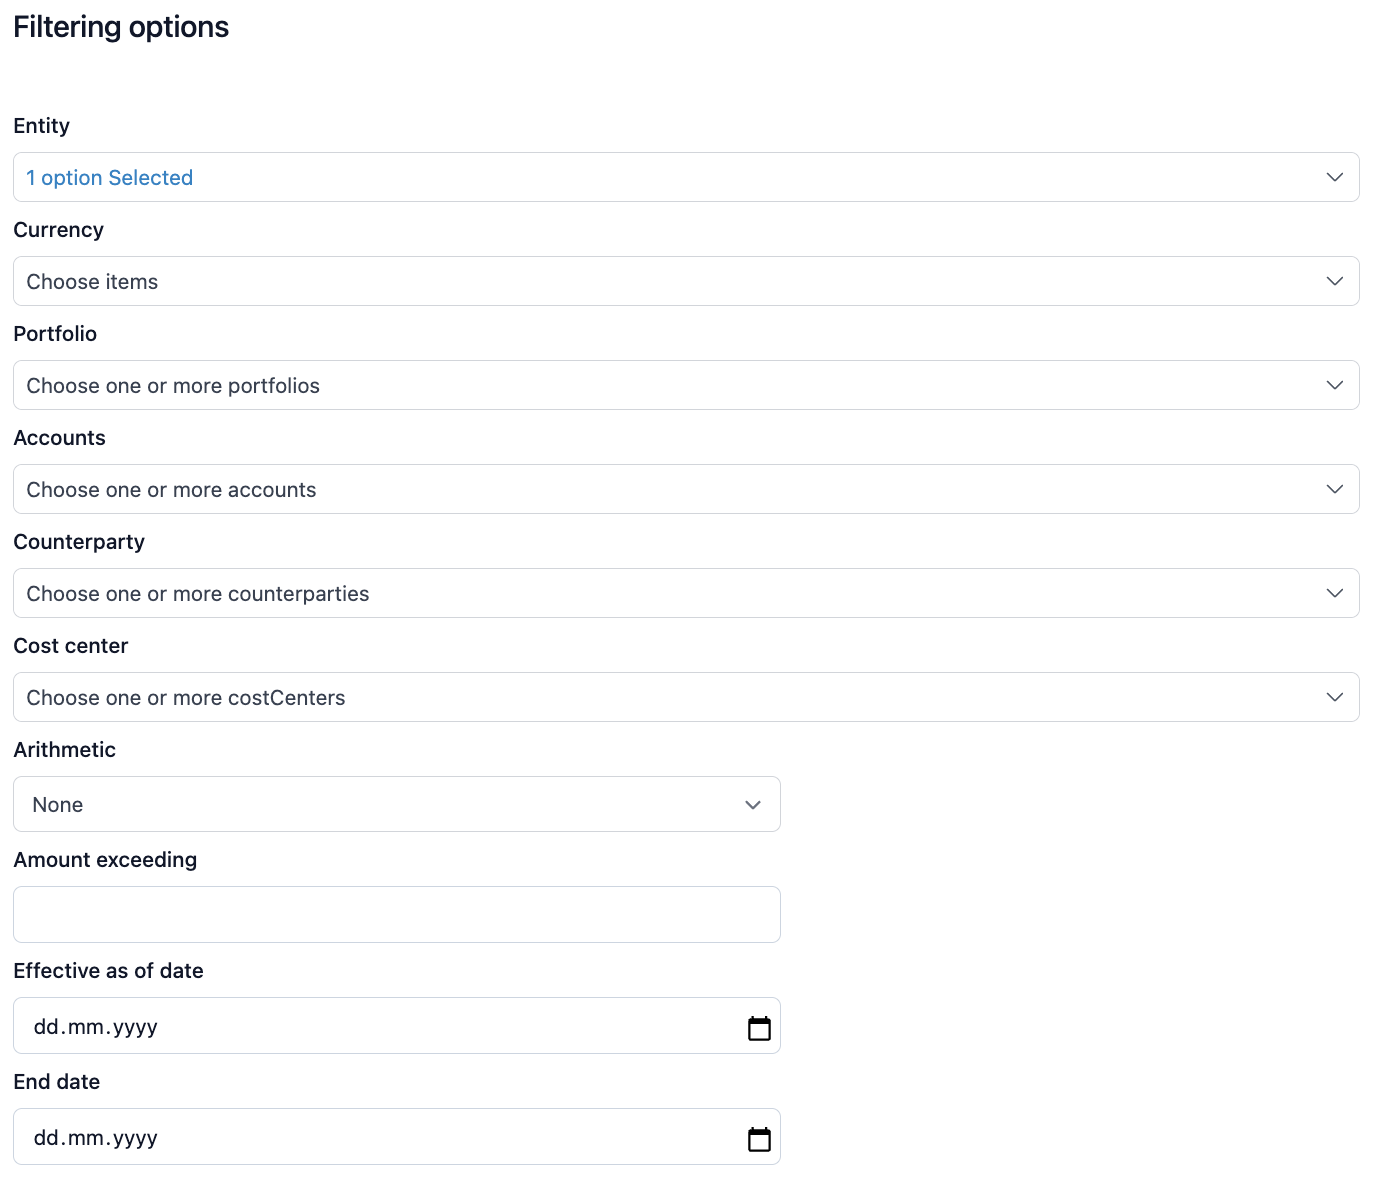
- Next, you can add the filtering options for your approval flow by selecting entity, currency, portfolio, accounts, counterparty, cost center, selection related to the threshold amount and effective dates.
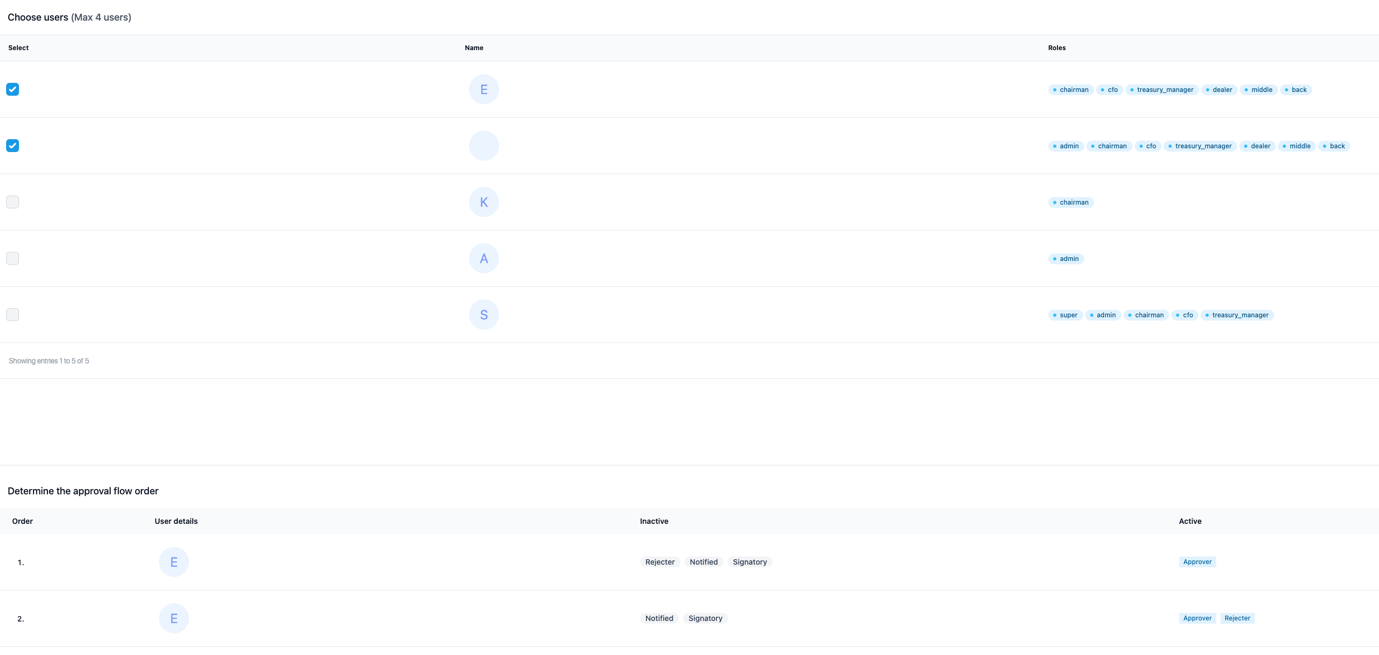
- And finally, choose the users who are linked to the approval flow. After selecting the users, you can determine the approval flow order and save the flow by selecting add.
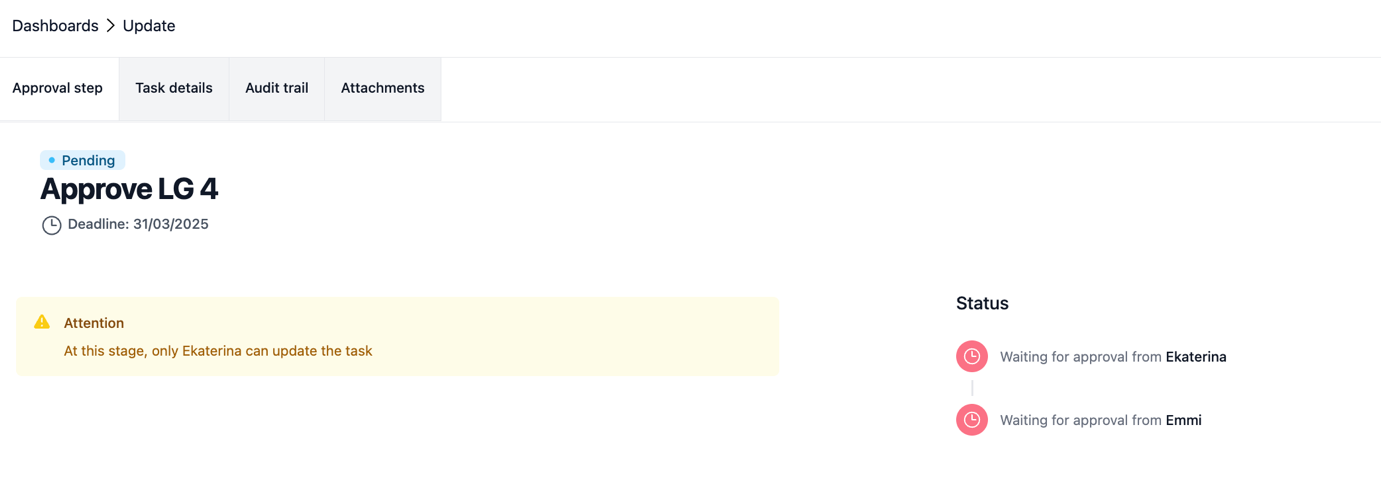
After saving the approval flow, you will see 'Pending' status related to the event that triggers the flow. Here, as the approval flow was set for adding a guarantee agreement, the pending status is signalled after creating a new guarantee agreement.

You can also see the chain of approval flow events from the 'Approval flow' tab linked to the agreement created.

And access to see the flow steps by selecting 'View'.
Manual approval flow
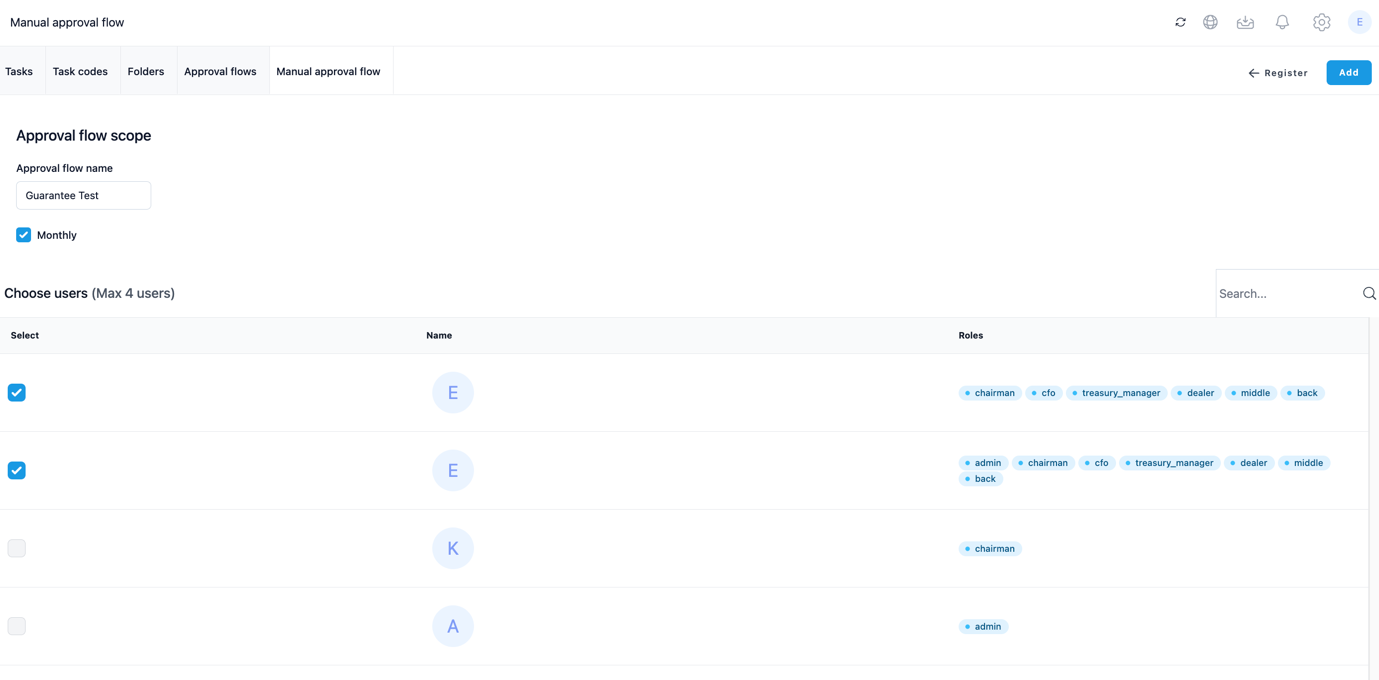
You can create a manual approval flow by selecting Task Management > Manual approval flow.
Start by filling in the name. If you want, you can define the frequency for the approval flow. Next select the users who are acting as approvers for the flow you are creating. You first select the users from the list. After that you can drag and drop to change the order of the approvers in the bottom part of the page.
Select 'Add' to save your flow and you can then find it from the list of approval flows where you can still edit the content if needed.

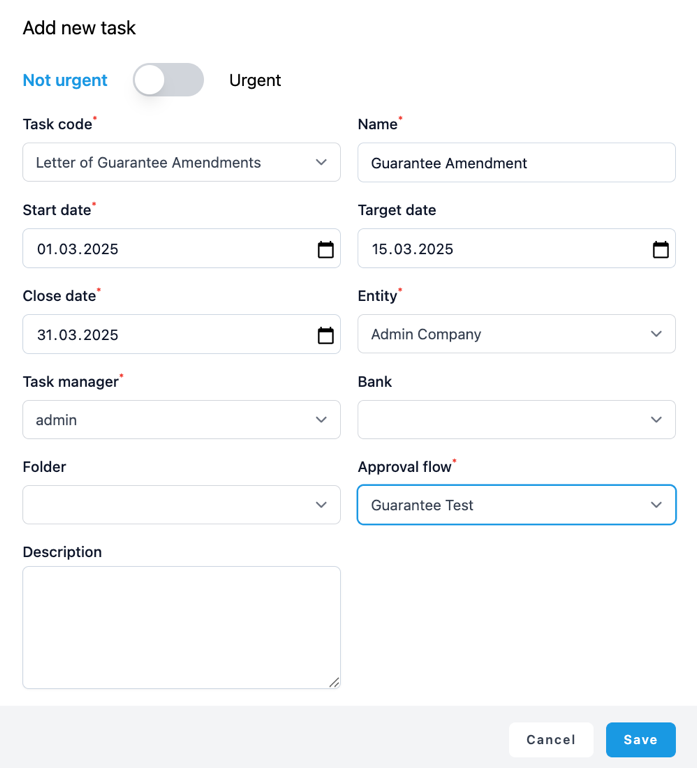
Next, navigate to Tasks > Add and create the manual task linked to the flow by:
- Adding the urgency
- Selecting a task code
- Naming the task
- Filling in the start date, target date and close date
- Selecting the entity, it relates to
- Choosing a task manager for the task
- Filling in details related to bank and folder and description
- And finally selecting the approval flow you just created
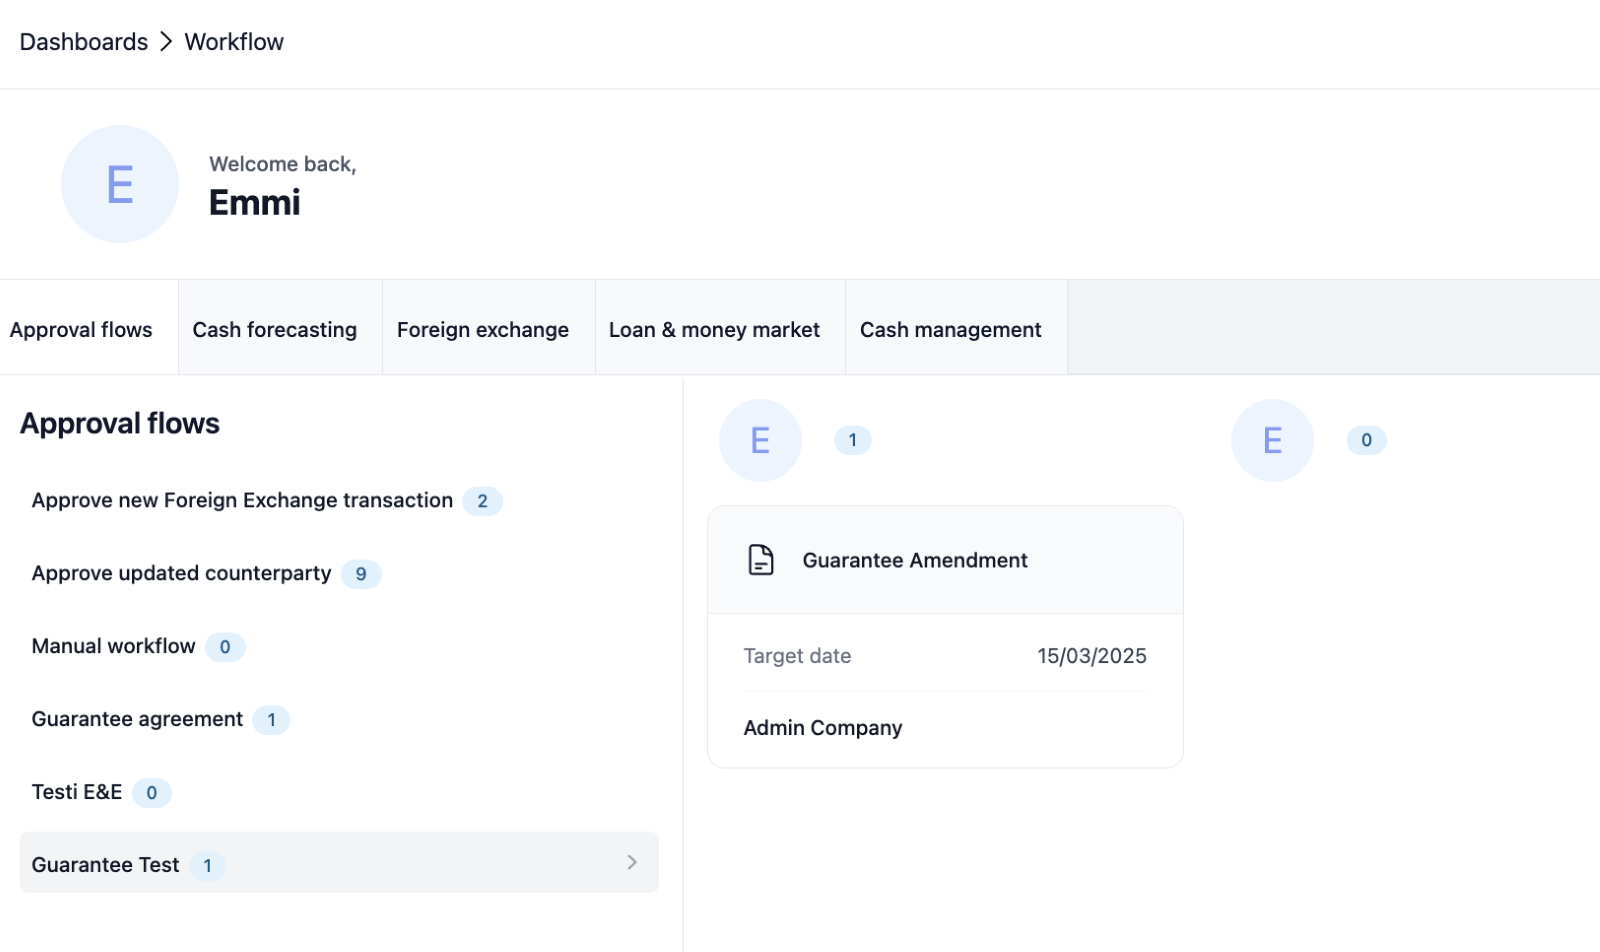
After saving the data you can find it from the list of approval flows from Dashboards > Workflows.
By clicking it open you can fill in your message and send it to next approver by selecting 'Approve'.
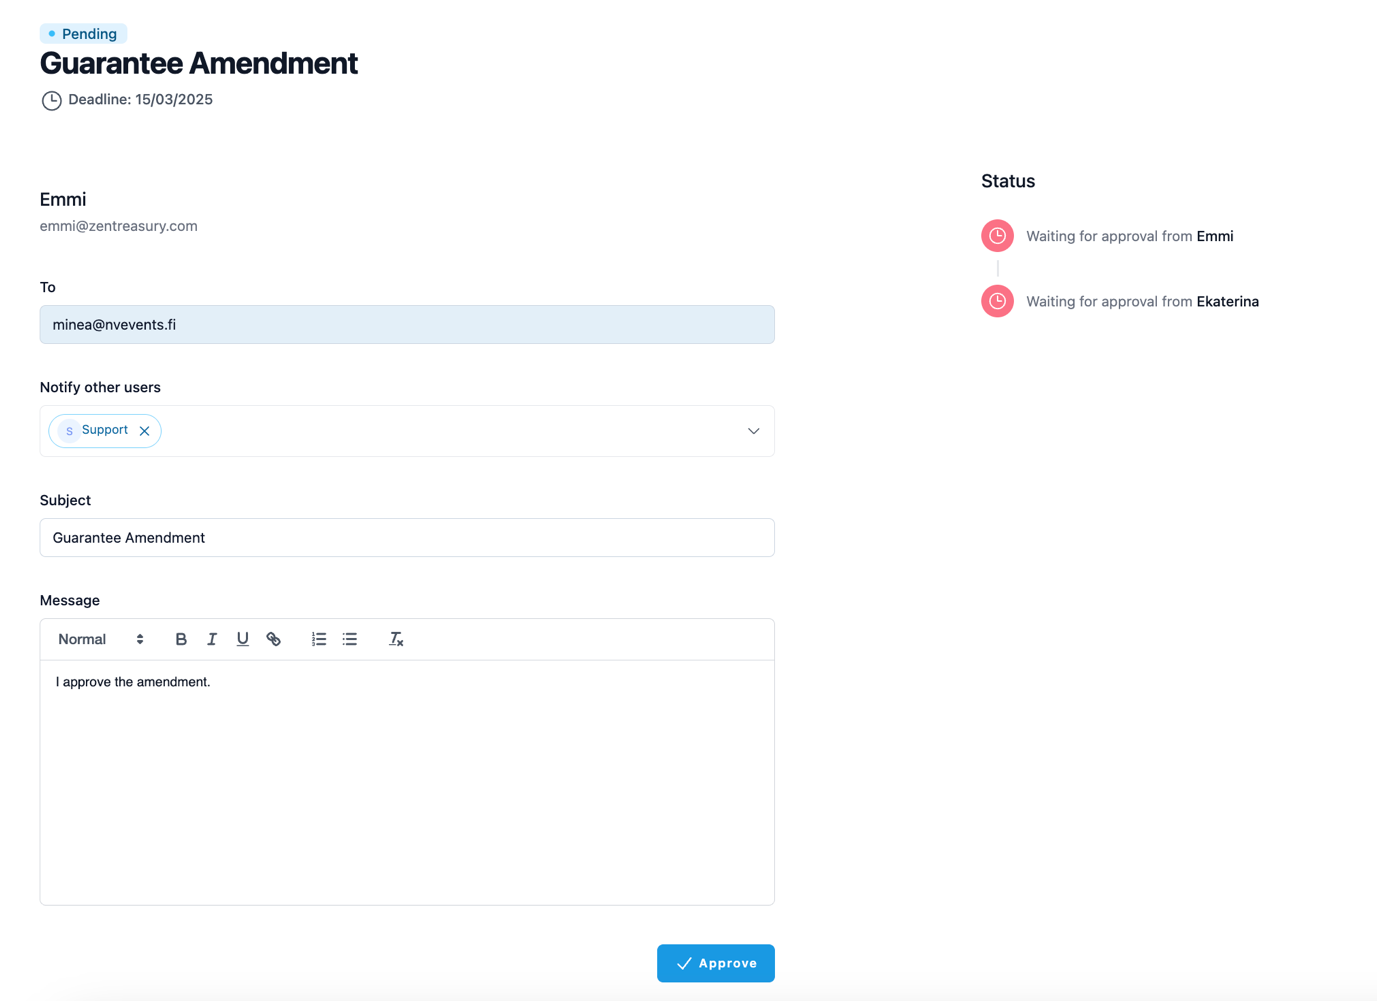
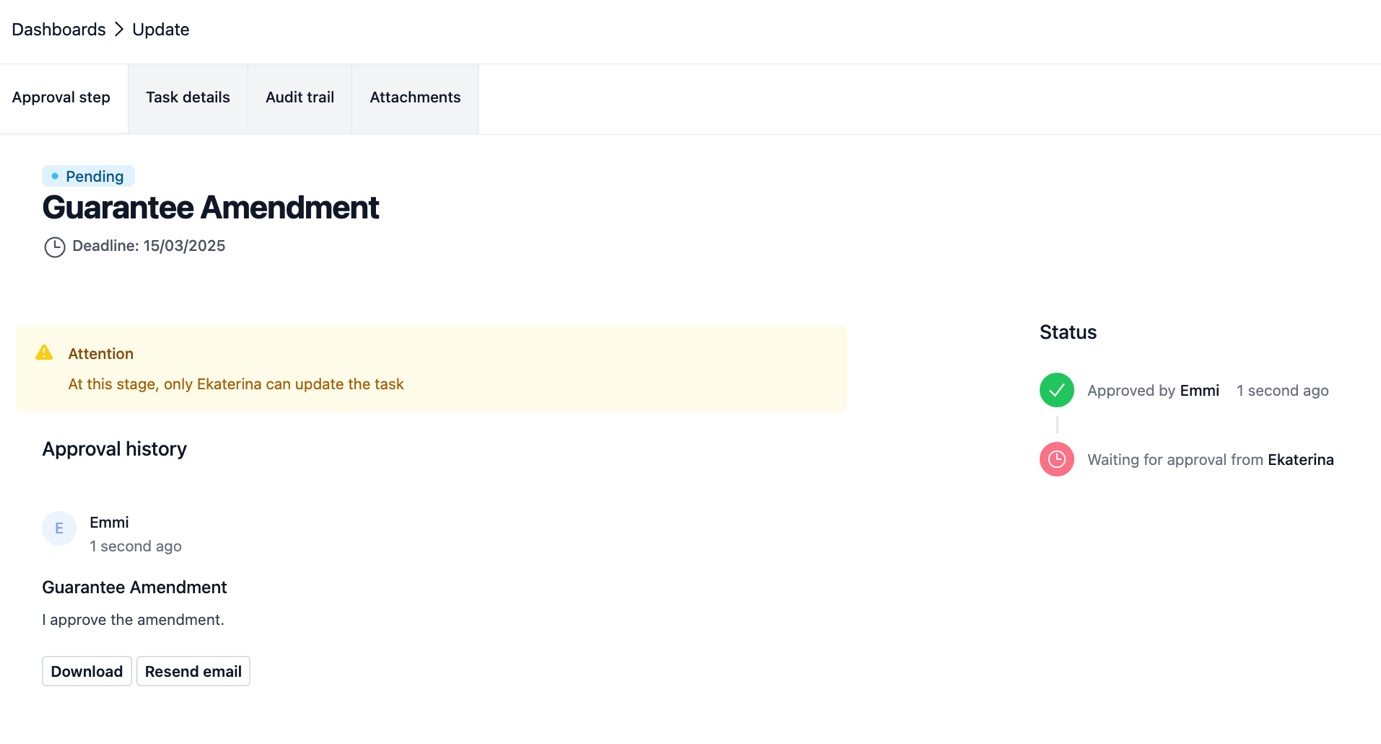
After that, you can follow the status of the task created, download it or send another email to remind the following approver.
Was this article helpful?
That’s Great!
Thank you for your feedback
Sorry! We couldn't be helpful
Thank you for your feedback
Feedback sent
We appreciate your effort and will try to fix the article